
The spool spins in the void, the line no longer comes out, and the lawn looks like a botched haircut with scissors. On Bosch trimmers, the problem almost always comes from the same place: a worn, poorly wound, or stuck line in the cutting head. Knowing how to replace this nylon line correctly avoids having to buy a new spool every weekend and allows for a clean cut from the very first pass.
Soaking the nylon line before installation: the step that the Bosch manual does not mention
In practice, a new nylon line taken out of its packaging is often stiff and brittle. User feedback on Bosch trimmers converges on one point: dipping the nylon spool in water for 24 hours before reassembly restores its flexibility and significantly reduces breakage during automatic feed.
The nylon absorbs moisture and regains elasticity that it loses during storage. A flexible line better withstands contact with concrete edges, walls, or stones without breaking abruptly. This tip works regardless of the Bosch model (EasyGrassCut, ART 24, ART 27, ART 30, 18V range).
When you need to change the line of a Bosch trimmer, it’s best to start with a consumable in optimal conditions. A dry and rigid line wound under tension in the spool causes feeding jerks, that infamous line that comes out in bursts instead of unwinding gradually.

Line diameter and winding direction on Bosch models
Using a line of the wrong diameter is the primary cause of malfunction after replacement. Each Bosch model accepts a specific diameter, and installing a line that is too thick forces the feed mechanism to the point of jamming.
Check the diameter before buying
The recommended diameter is indicated on the protective cover or in the model’s manual. The EasyGrassCut and ART series generally use round line, but the diameter varies from one model to another. Installing a thicker line thinking it will cut more effectively produces the opposite effect: the motor struggles, the head overheats, and the line breaks faster.
The winding direction, a classic trap
Bosch semi-automatic heads are sensitive to the winding direction. An arrow engraved inside the spool indicates the direction to follow. Winding in the wrong direction prevents the tap-and-go system from releasing the line correctly.
- Locate the directional arrow inside the spool housing before winding
- Maintain consistent tension while winding to avoid overlapping coils
- Leave the necessary length of line protruding before closing the cover, without excess (the integrated cutting blade in the housing will adjust it)
Winding too tightly compresses the coils against each other. At the time of feeding, the line gets stuck instead of unwinding. It’s better to wind with a slight play than to cram as much line as possible into the spool.
Removing the Bosch cutting head without breaking the tabs
On newer models, particularly the cordless 18V range, Bosch has designed tool-free manipulable heads. Two or three pressure tabs hold the lower cover. The action seems simple, but forcing the tabs in cold weather weakens them to the point of cracking.
The reliable method: place the trimmer on the ground, head facing up. Simultaneously press both tabs with your thumb and index finger, then pull the cover down in a steady motion. If the cover resists, a quarter turn counterclockwise is sufficient on some models (ART 30, ART 27+).
On older corded models, a central button under the head releases the spool. Removing the battery or unplugging the power cord before any manipulation remains a reflex not to be neglected: Bosch explicitly recommends cutting off all power sources before working on the cutting head.
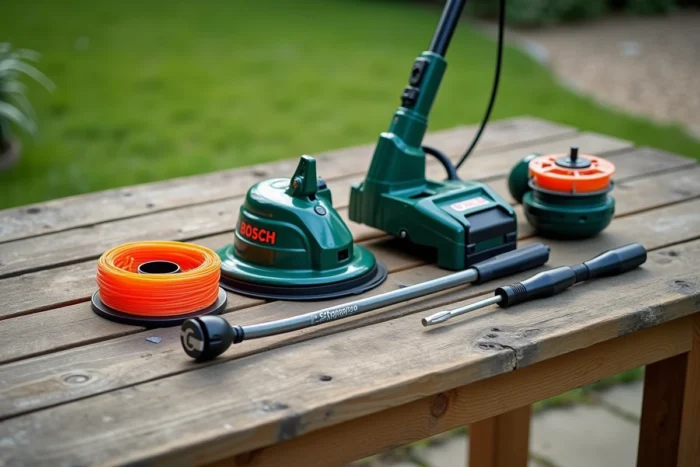
Take advantage of the line change to inspect the cutting head
Every line replacement is an opportunity to check the overall condition of the head. Compacted grass residues under the cover hinder the free rotation of the spool. A quick cleaning with a dry brush or cloth is sufficient.
- Check the wear of the line exit eyelets (ovalized eyelets prematurely wear the nylon)
- Ensure that the return spring under the spool is not deformed or stuck by debris
- On angled models, apply a bit of grease to the mechanism to maintain smooth rotation
- Inspect the integrated cutting blade in the housing, which cuts the line to the correct length (a dull blade leaves a frayed line that cuts poorly)
Feedback varies on this point, but several users report that a worn exit eyelet causes as much line breakage as an incorrect diameter. Replacing this eyelet is inexpensive and extends the lifespan of each spool.
Maintenance that takes five minutes
The entire process (removing the cover, cleaning, winding the line, reassembling) takes just a few minutes once the action is mastered. The first replacement always takes longer than subsequent ones. Keeping a pre-soaked line spool in a bucket allows you to avoid interrupting a mowing session for maintenance.
The nylon line remains a consumable. Accepting to replace it regularly, with the correct diameter and careful winding, yields a clean cutting result without overstraining the motor. A well-maintained Bosch trimmer at this level retains its cutting power season after season.